
What's in the box and how hard is setup?
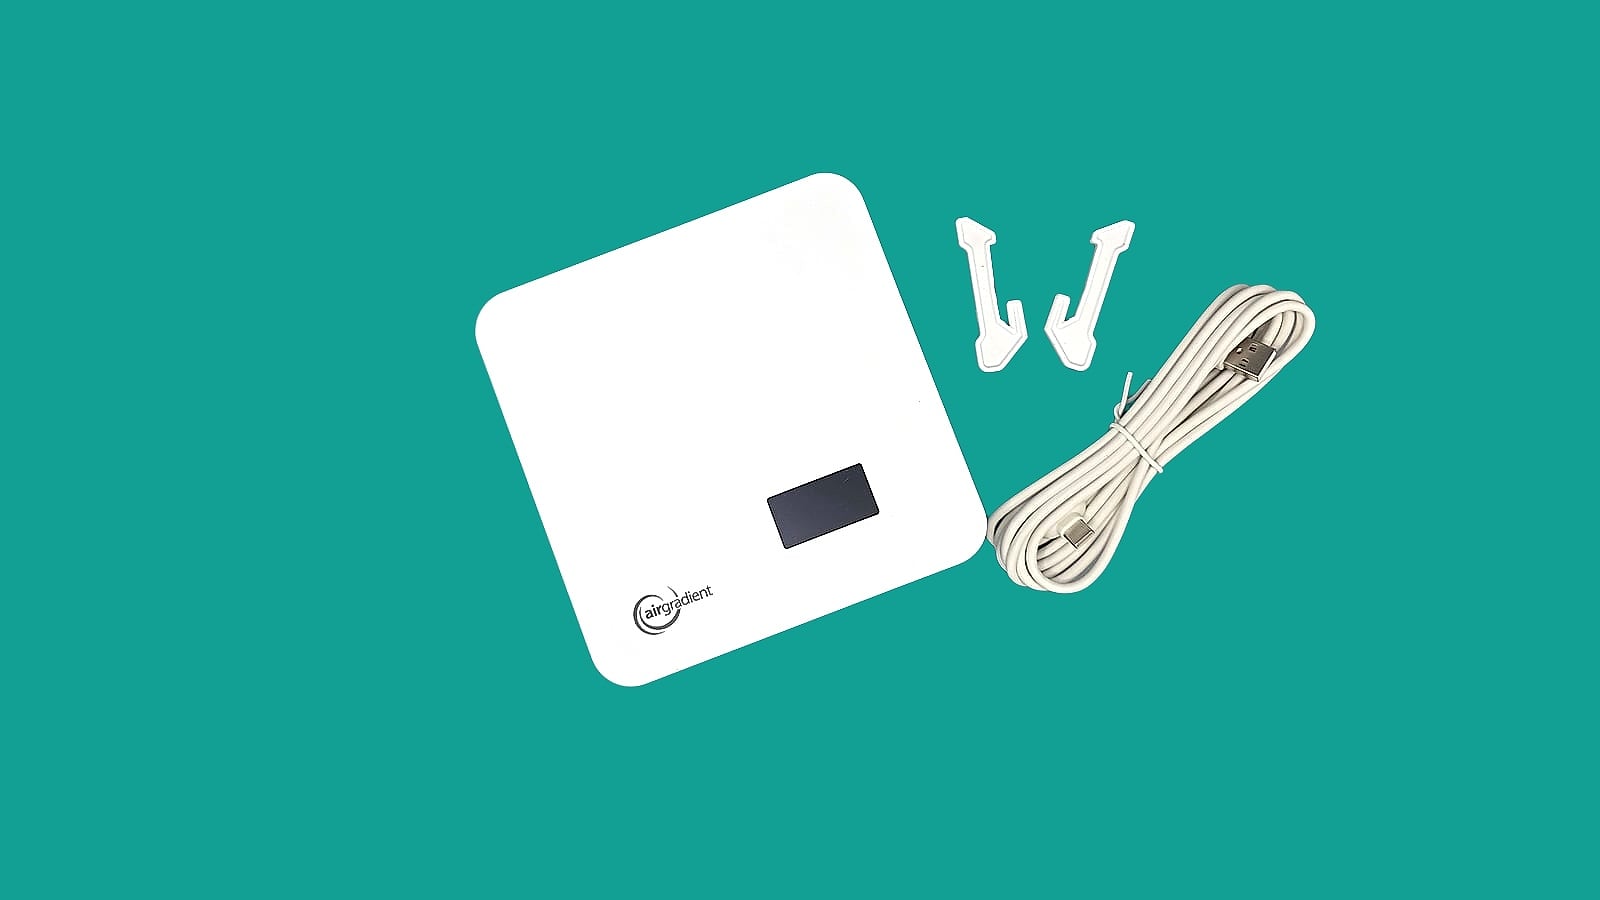
Pick it up and the AirGradient ONE feels properly made — the ASA enclosure doesn't flex or creak, a world away from the slightly wobbly feel some open-source hardware has. The assembled unit arrives ready to power on: the monitor itself, a USB power adapter, a 2m USB-C-to-USB-A cable, and two wall-mounting brackets. AirGradient specifies a 5V/2A supply, so if you swap the adapter for one of your own, use a decent one rather than the weakest charger in the drawer.
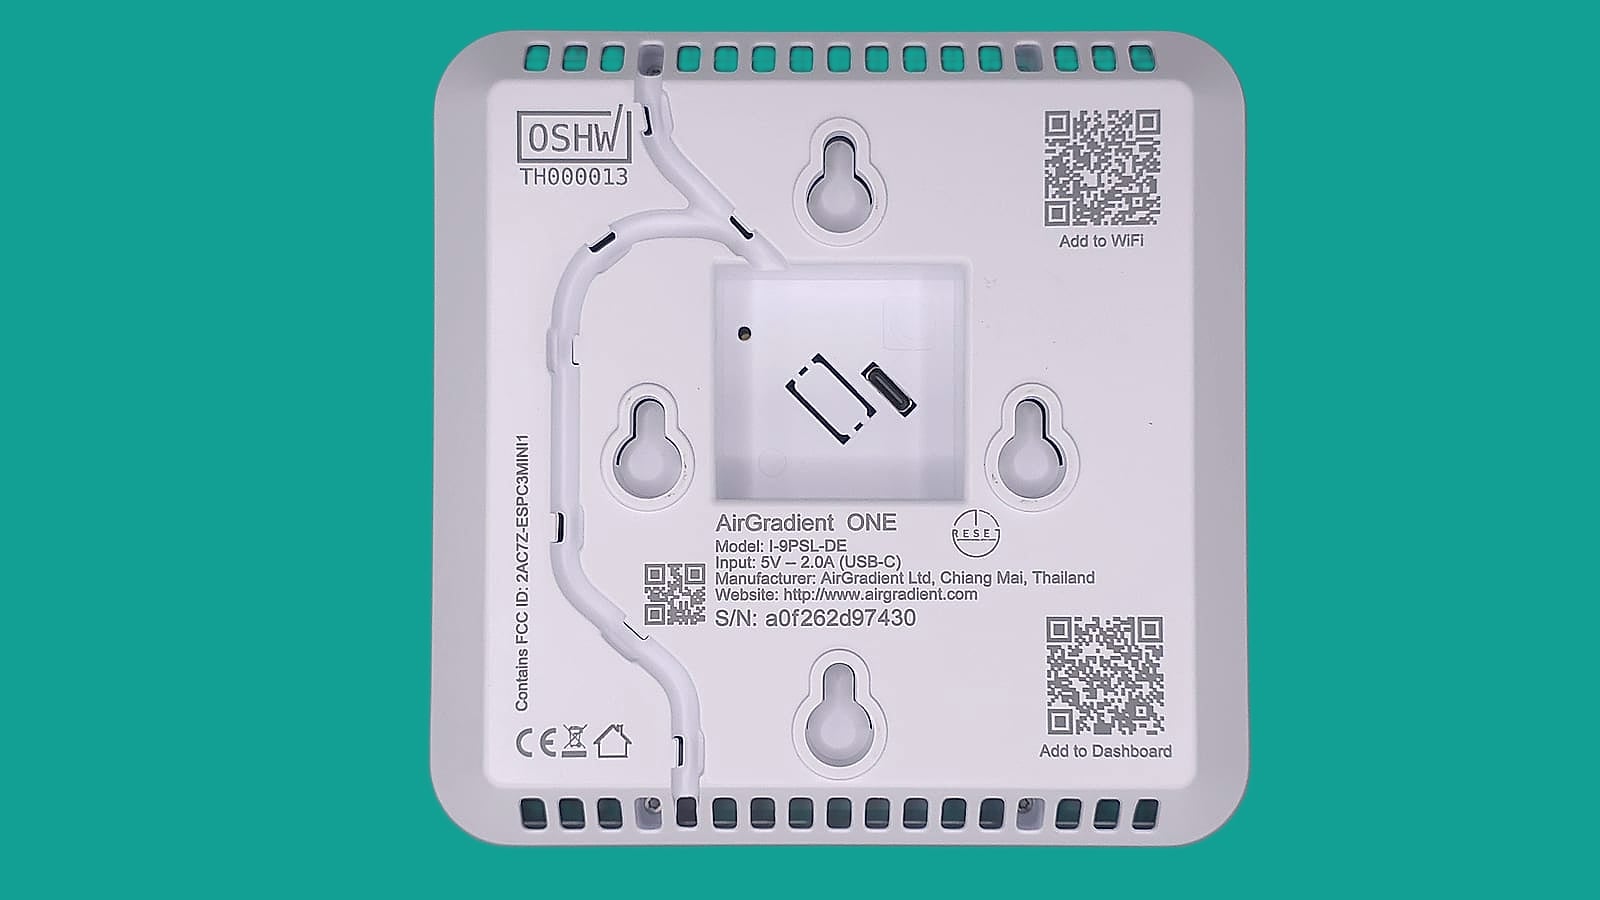
The underside is well thought out. A moulded channel routes the USB-C cable from the port out through a vent slot, so nothing dangles, and the label carries the exact model variant (ours is the I-9PSL-DE), the FCC ID, an OSHW certification number and two QR codes that jump straight to the Wi-Fi and dashboard setup steps.
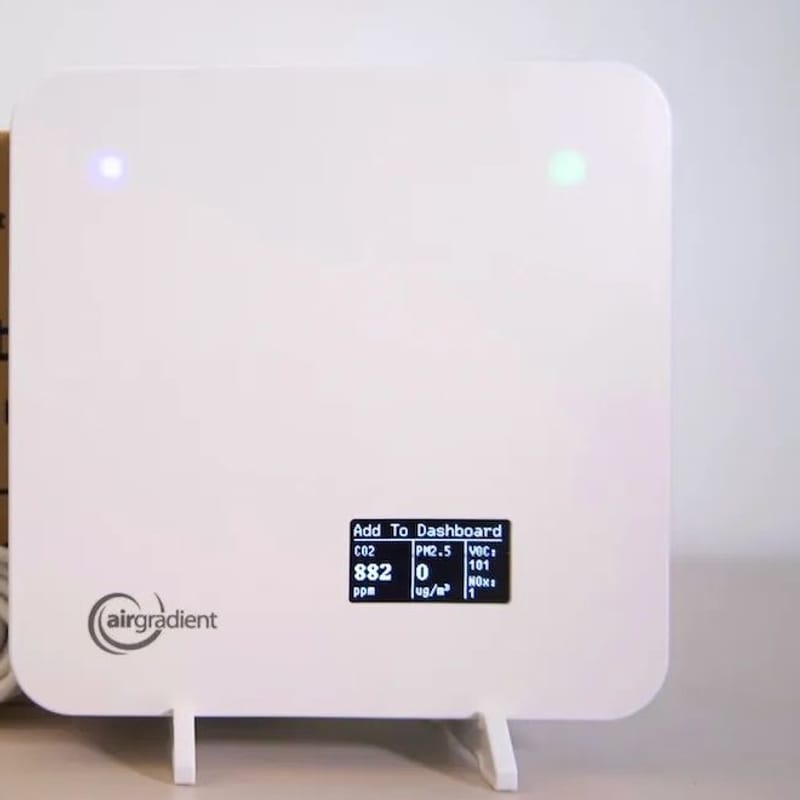
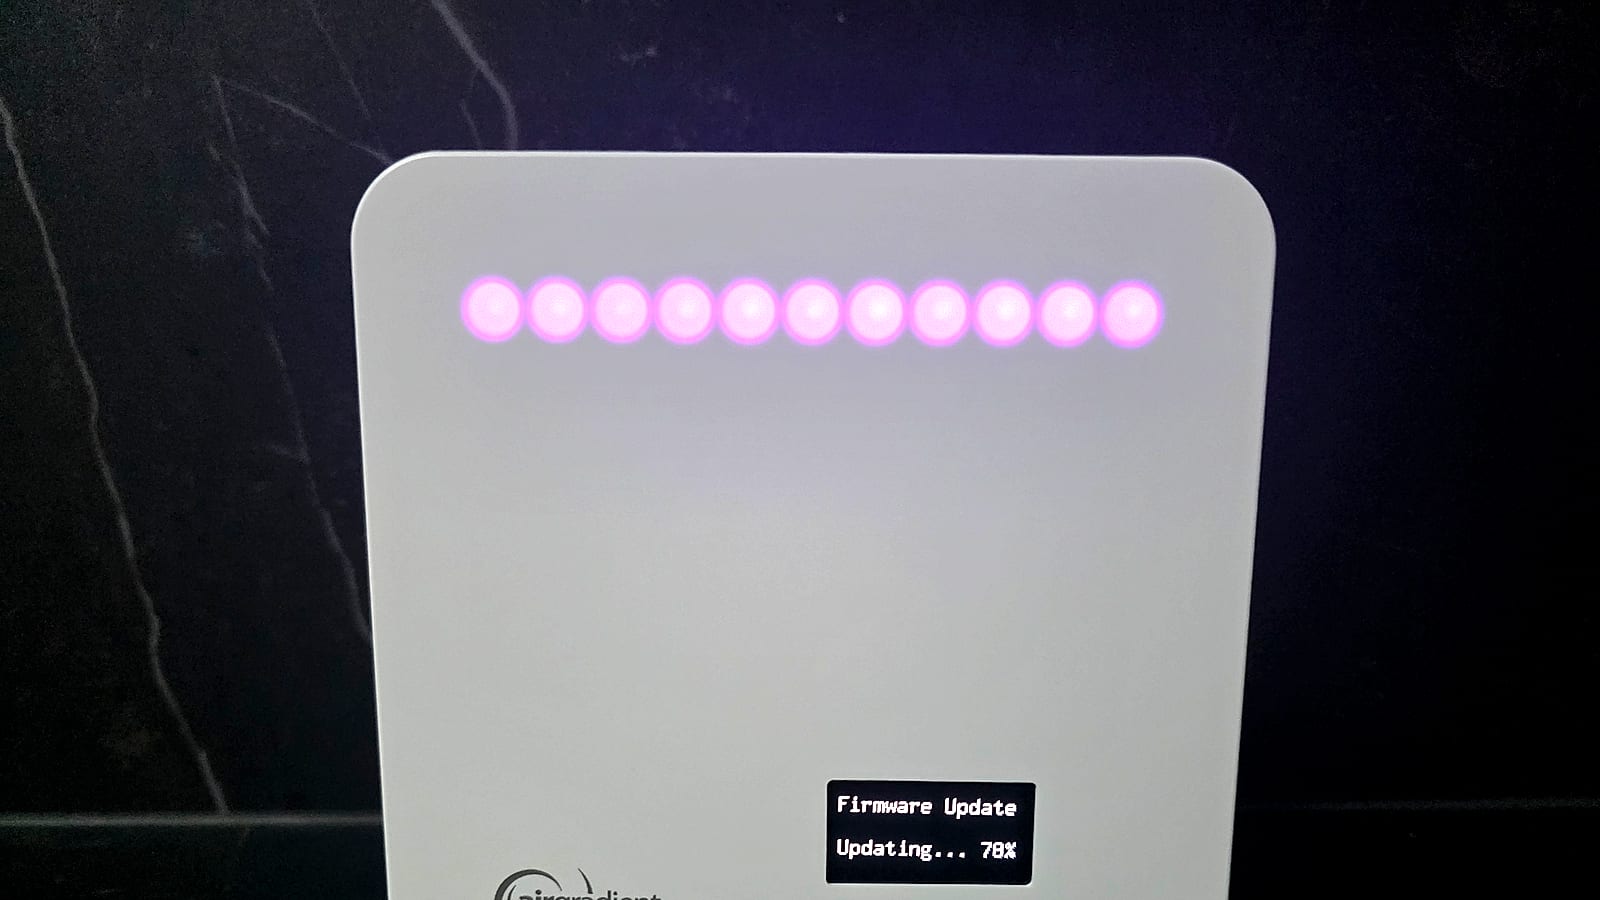
First boot pulls a firmware update automatically — ours sat on the OLED's "Updating..." screen for a couple of minutes with the LED bar solid purple, then rebooted into a live CO2/PM2.5/VOC readout. Updates come over the air from AirGradient's own server without needing a dashboard account, and Home Assistant later exposes an update entity so you can see when a new firmware lands.
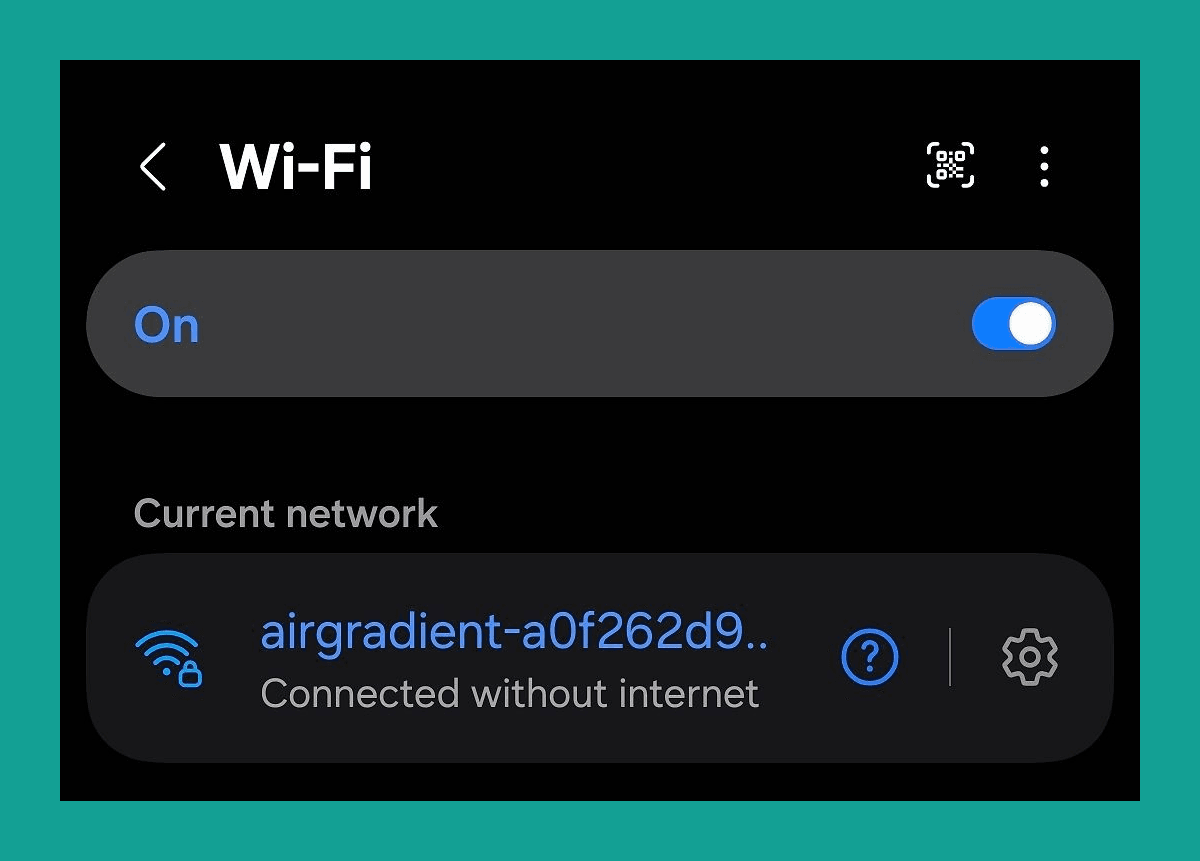
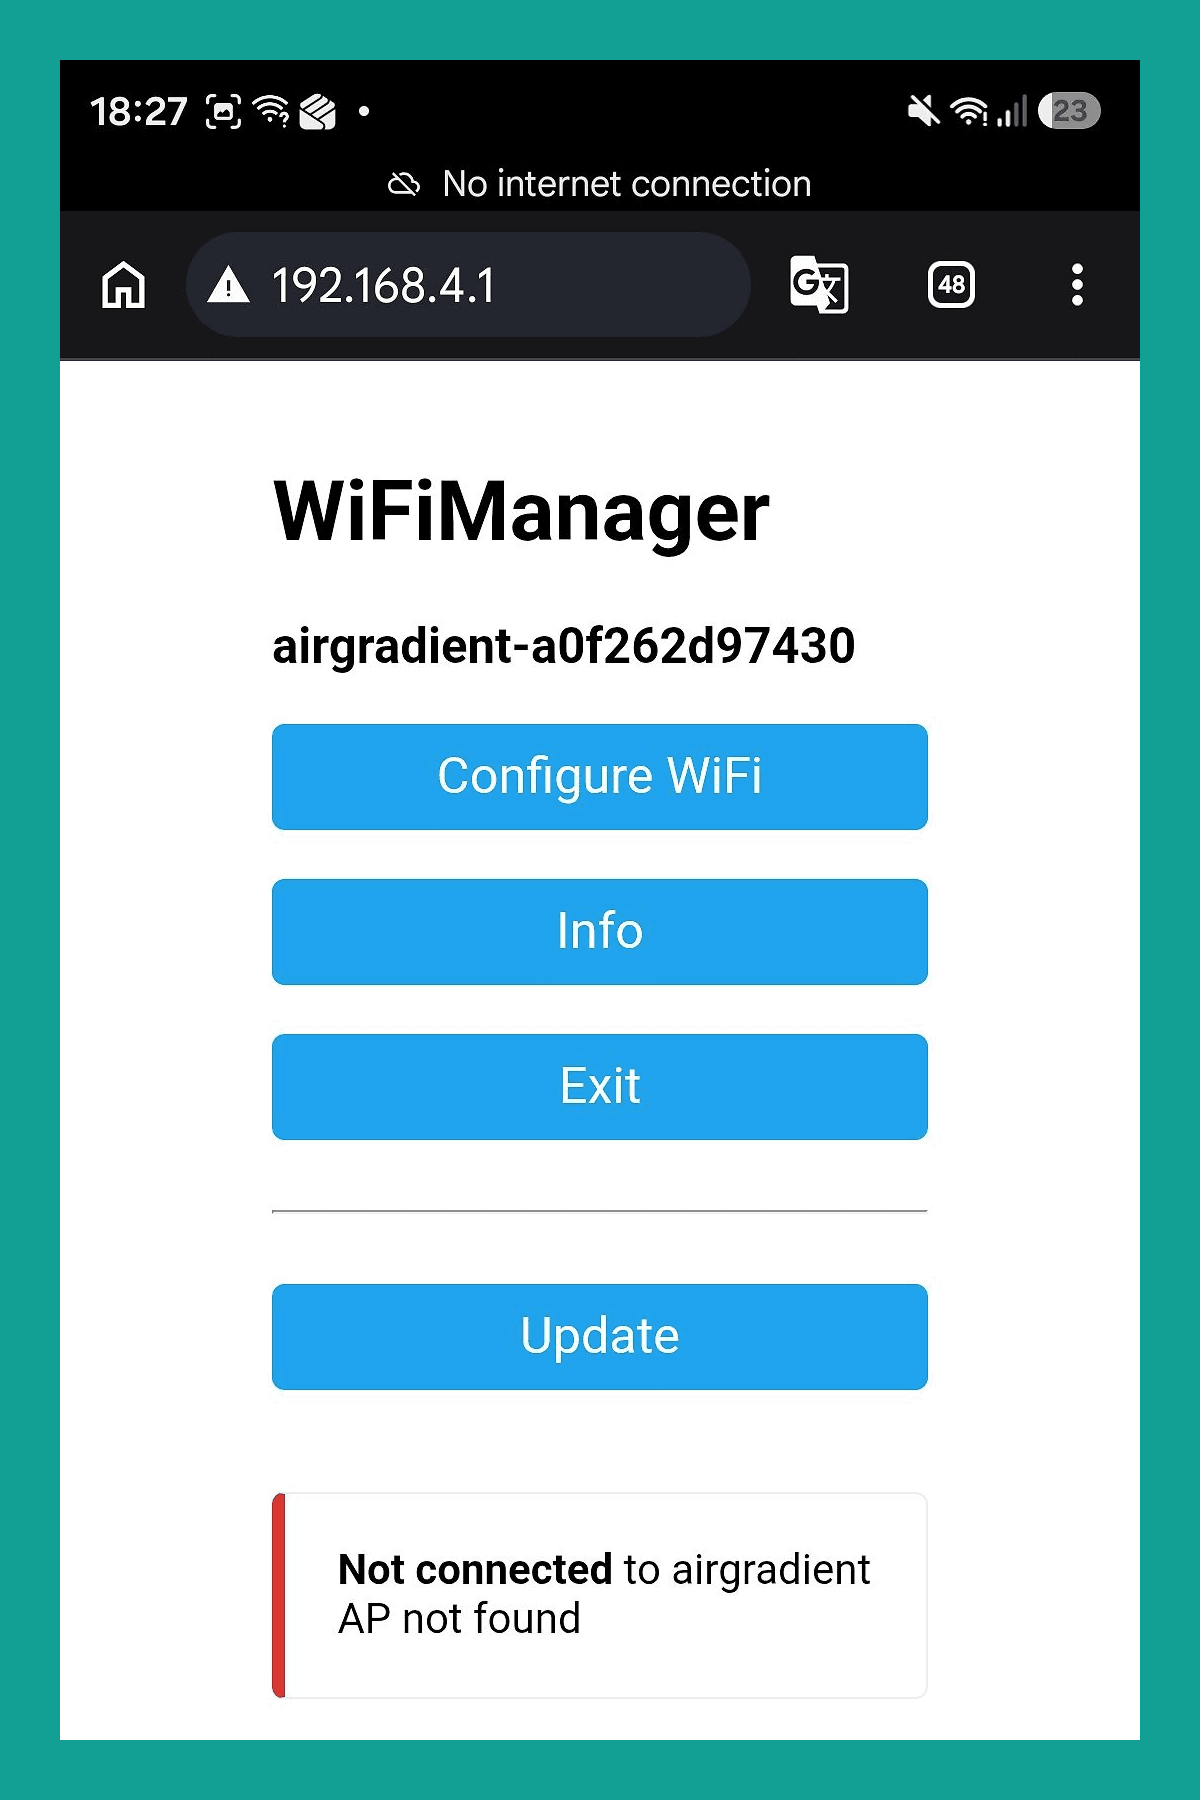
Wi-Fi setup uses a captive portal rather than an app: the device broadcasts its own access point named airgradient-<serial>, you join it from your phone's Wi-Fi settings, and a WiFiManager page asks for your home network and password. This is the one part of setup that isn't obvious. On several phones, joining the hotspot didn't pop up the usual "sign in to network" prompt, so it looked as if the connection had failed. If that happens, stay connected and open 192.168.4.1 in a browser — the same page loads.
It's more manual than the app-guided pairing of a Ring or Hive product, but it took under five minutes and needed nothing installed. Note that the radio is 2.4GHz only, so on a mesh with a combined SSID you may need to stand near the router while it joins.
Crucially, that setup screen has a checkbox: "Prevent Connection to AirGradient Server." Tick it and the device never phones home — it just serves data locally over its HTTP API, with no cloud dashboard and no automatic updates. We left it unticked so we could try the dashboard, which is free — AirGradient scrapped its $2-a-month tier in July 2026 — but the same setting is exposed later as a switch in Home Assistant, so you can go fully local at any point.
Does the AirGradient ONE work with Home Assistant?
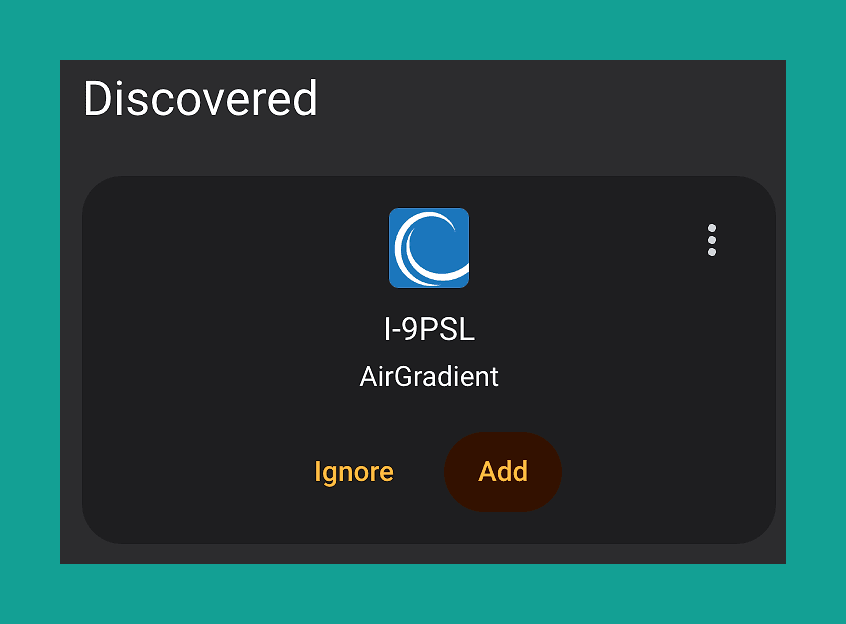
Yes — natively, and better than any other air quality monitor we've tested. The integration has shipped in Home Assistant core since the 2024.6 release, carries a "platinum" quality-scale rating, and AirGradient joined the official "Works with Home Assistant" programme in August 2025. It needs firmware 3.1.1 or newer, which the first-boot update takes care of. Once the monitor is on your network, discovery offers to add it as "I-9PSL / AirGradient" with no IP entry — the same flow covered in our Home Assistant UK setup guide (add it by hostname if discovery doesn't cross your VLAN).
The integration works over local polling, not cloud push: Home Assistant reads the device's HTTP API every 60 seconds, so automations don't depend on AirGradient's servers being up. It exposes a long entity list — CO2, PM1/PM2.5/PM10, PM0.3 particle count, VOC index, NOx index, temperature and humidity, plus raw, uncompensated variants of the VOC, NOx and PM2.5 readings for anyone who wants their own calibration curve.
The configuration entities are the interesting part. You get the LED bar mode and brightness, display brightness and units, the CO2 auto-calibration interval and a one-press calibrate button, the VOC and NOx learning offsets, a "share data with AirGradient" switch and the firmware update entity — so every hardware setting can be driven from an automation, not just from the on-device menu. Anything else on your network can read the same data straight from the device at http://airgradient_<serial>.local/measures/current, which is how the integration works under the hood.
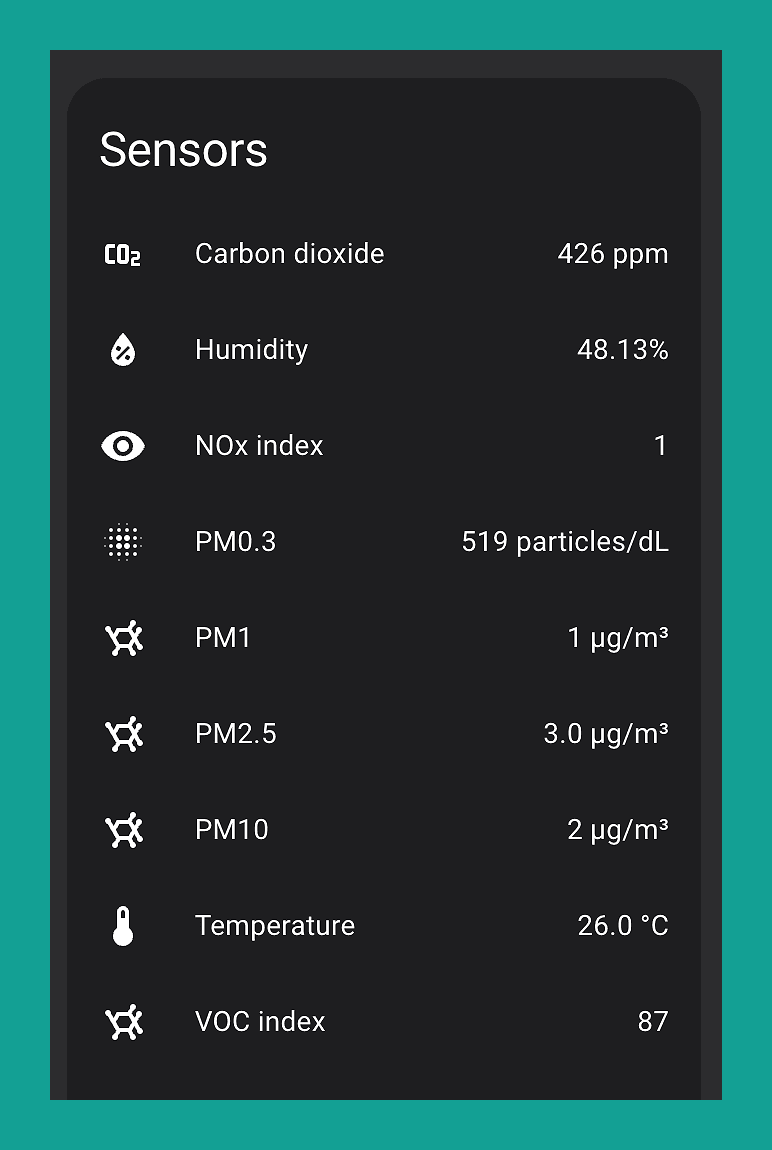
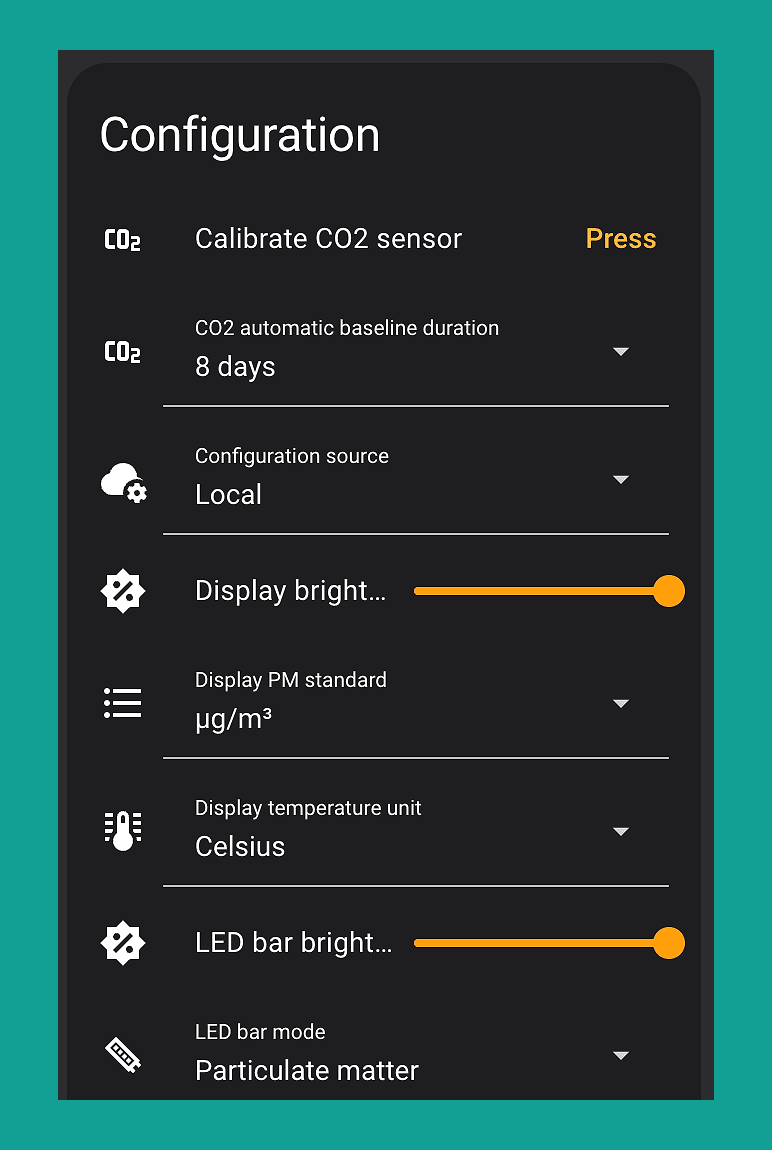
That "LED bar mode" setting answers a question we had out of the box: the 11-LED colour bar isn't decoration. It tracks one pollutant at a time — ours shipped following particulate matter — shifting green to amber to red as the reading changes, visible from across the room. In CO2 mode the firmware's default thresholds turn it amber at 1,000ppm and red at 2,000ppm, and you can switch modes from the device menu or the Home Assistant entity.
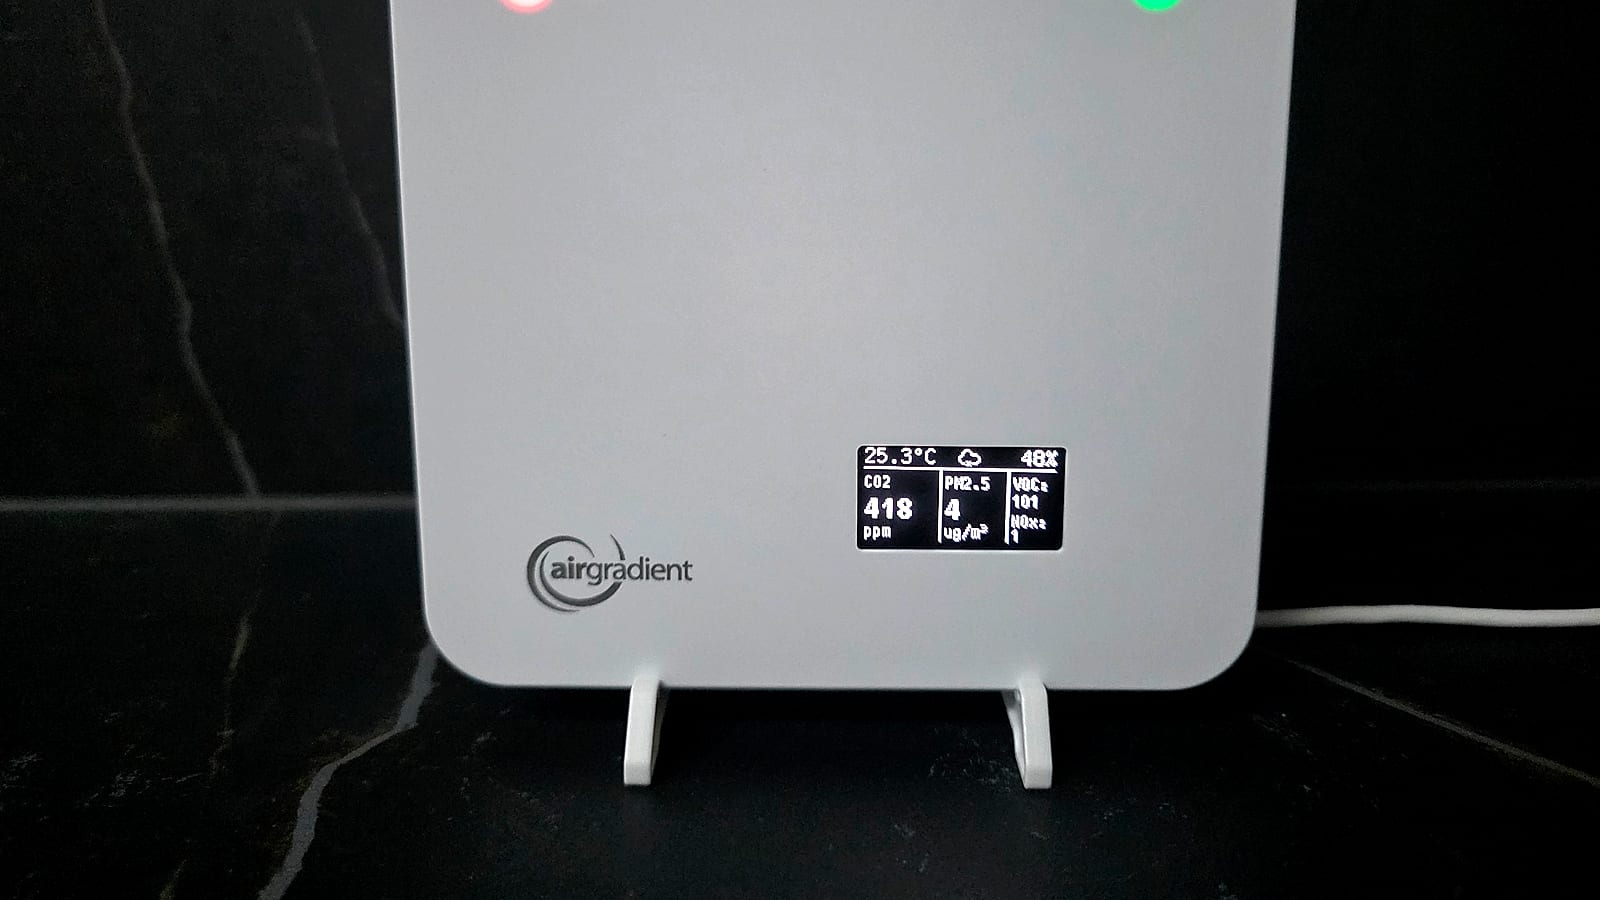
If you'd rather run it on ESPHome, you can: AirGradient publishes a browser-based flasher and the community MallocArray ESPHome package supports the ONE. We'd only bother if you want to change what the firmware does — for everyone else the stock firmware plus the core integration gives the same entities with far less upkeep, and keeps the over-the-air updates.
What can you automate with it?
The CO2 entity is the one that earns its keep. The UK's Health and Safety Executive treats a CO2 level consistently above 1,500ppm in an occupied room as a sign of poor ventilation, and puts 1,000ppm at roughly the fresh-air rate of 10 litres per second per person that building guidance aims for — so a notification when the kitchen crosses 1,000ppm is a genuinely useful "open a window" nudge rather than a novelty. This is the automation we run:
alias: Kitchen CO2 high
triggers:
  - trigger: numeric_state
    entity_id: sensor.i_9psl_carbon_dioxide
    above: 1000
    for:
      minutes: 10
actions:
  - action: notify.mobile_app_phone
    data:
      message: "Kitchen CO2 is {{ states('sensor.i_9psl_carbon_dioxide') }} ppm — open a window"
Two more that use the configuration entities: a night mode that sets number.i_9psl_led_bar_brightness and number.i_9psl_display_brightness to 0 at 23:00 and back to 100 at 07:00, so the bar doesn't glow all night in a bedroom (the firmware also has its own day/night schedule, 08:00–20:00 by default, if you'd rather not automate it); and a PM2.5 trigger above 35µg/m³ that switches on a smart plug driving an extractor fan or purifier. Entity IDs follow the device name — ours kept the default I-9PSL — so check yours on the device page before copying.
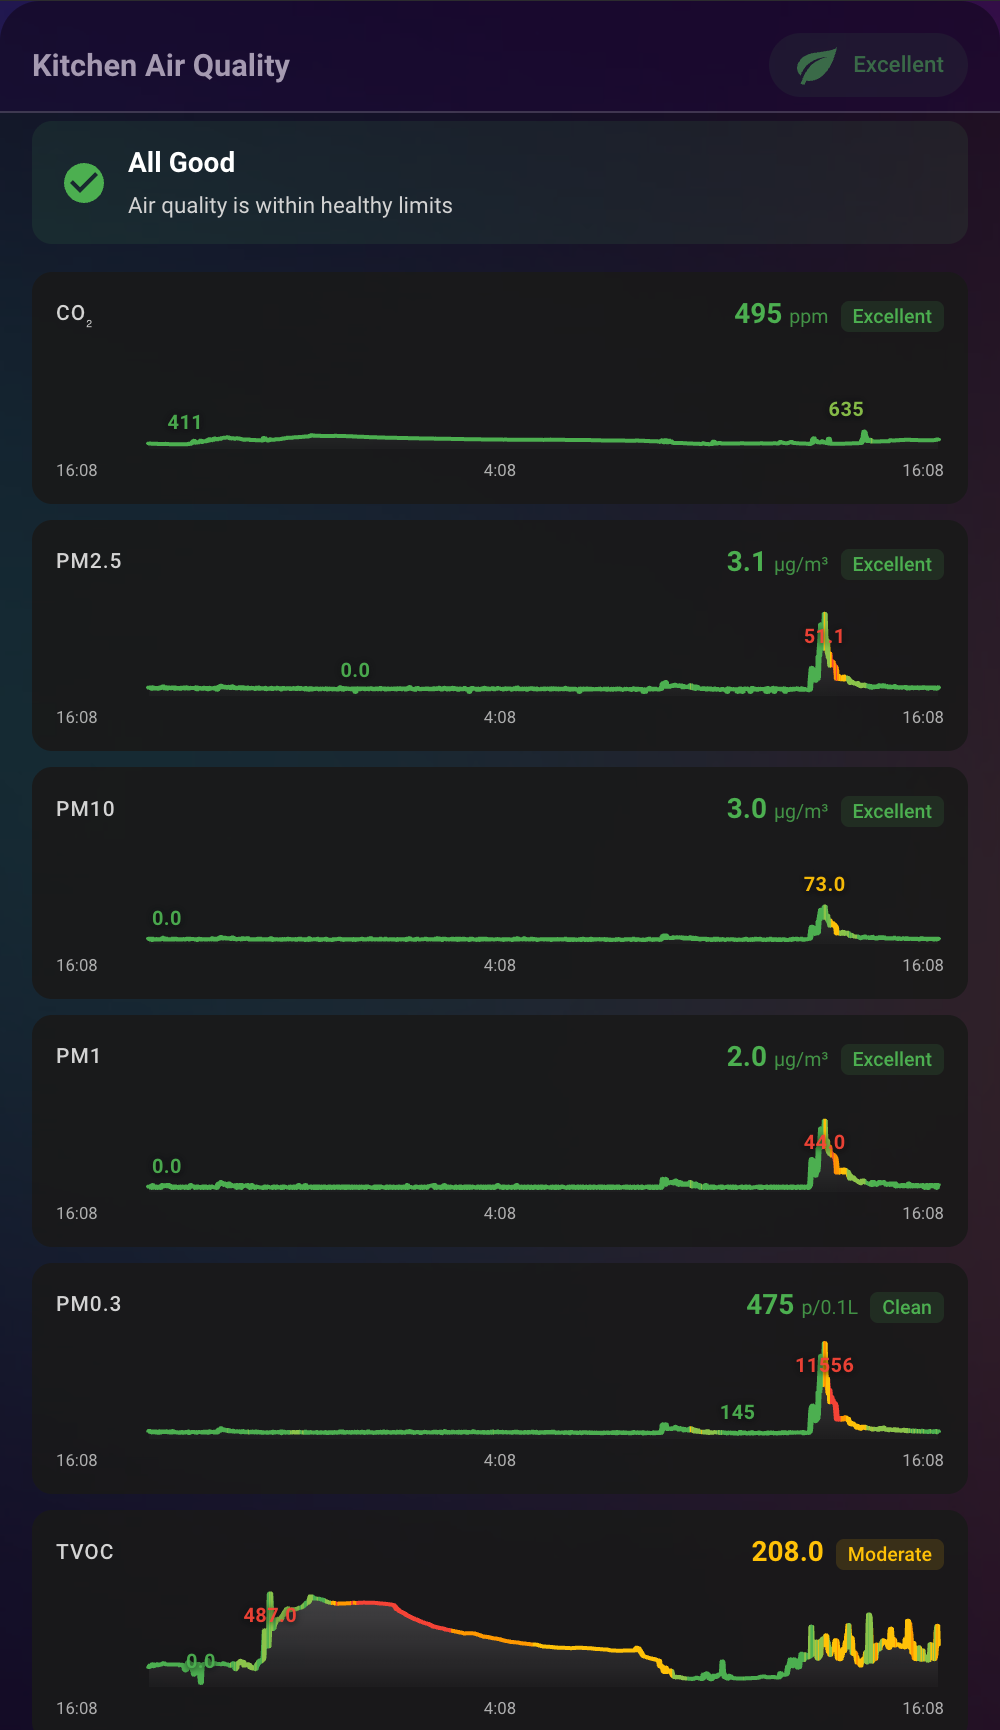
After a full day-night cycle in a kitchen, the Home Assistant history graphs below tell a more useful story than the first-hour snapshot. Overnight CO2 held a flat baseline around 411ppm and crept up to 635ppm at its daytime peak — well inside the well-ventilated range. The PM2.5, PM10, PM1 and PM0.3 traces stayed flat for most of the day, then spiked hard for 15–20 minutes around midday: PM2.5 jumped from near zero to 51µg/m³ and the PM0.3 count passed 11,000 per 0.1L, before dropping back just as fast — a textbook cooking spike, caught clearly and cleared quickly. The VOC index started high (487) straight after setup, most likely off-gassing from the new enclosure, then settled to a "moderate" 208 over several hours.
How accurate are the readings, and what do they mean?
Accurate enough to act on, provided you understand what each sensor is doing. Our unit's CO2 sat in the low-400s at rest, matching outdoor ambient CO2 and a good sign the SenseAir S8 NDIR sensor was calibrated correctly. AirGradient quotes ±40ppm ±3% for it, and the S8 is a sensor SenseAir rates for more than 15 years of use. The thing to know is automatic baseline calibration (ABC): every calibration interval (eight days by default, adjustable in Home Assistant) the sensor assumes the lowest reading it saw was fresh air and resets that to about 400ppm. In a room that's aired daily that works perfectly; in a sealed spare room over a UK winter it can slowly read high. The fix is either a window that gets opened, or pressing the "Calibrate CO2 sensor" button in Home Assistant while the unit sits outdoors for a few minutes.
PM2.5 and PM10 come from a Plantower PMS5003 laser particle counter, the same sensor family found in many consumer purifiers. AirGradient specifies ±4µg/m³ below 100µg/m³ for the assembled unit, and ours reported low single digits at rest with no cooking or candles nearby. Two caveats: laser counters like this tend to over-report at high concentrations, and the PM10 figure is largely estimated from the smaller size bins rather than measured directly, so treat PM2.5 as the number that matters. The sensor's small fan is what draws air across the laser — we couldn't hear it even up close in a silent room, though AirGradient's forum has reports of units getting louder after a year or so as dust builds up. Both the PMS5003 and the S8 are plug-in modules you can replace yourself for a fraction of the unit price.
The VOC and NOx figures are indices, not concentrations. Sensirion's SGP41 outputs a number from 1 to 500 where 100 represents the average of what the sensor has seen over roughly the last 24 hours — so a VOC index of 200 means "twice the usual level in this room", not a ppb value, and a freshly unboxed unit reads high until it has learned the room. That is exactly why Home Assistant exposes a "learning offset" for both. It's fine for spotting a change (cleaning sprays, cooking, a new sofa) and useless for comparing two rooms in absolute terms.
How does it compare to the Aranet4, Apollo AIR-1 and cheaper CO2 monitors?
It's the most complete sensor set in this price band, but not the cheapest way to get a CO2 number into Home Assistant. The table below lines it up against the monitors we'd actually consider instead.
| Monitor | Measures | Home Assistant | UK price | Pick it when |
|---|---|---|---|---|
| AirGradient ONE | CO2, PM1/2.5/10, VOC index, NOx index, temp, humidity | Native, local polling over Wi-Fi | About £205 + shipping (direct import) | You want the full pollutant set on Wi-Fi with no cloud |
| Aranet4 Home | CO2, temp, humidity, pressure | Native, Bluetooth (needs a BT adapter or ESPHome proxy) | Around £189 | You want a battery-powered, portable e-ink CO2 meter you can move room to room |
| Apollo AIR-1 | PM1/2.5/4/10, VOC, NOx, temp, humidity (CO2 is an optional add-on) | ESPHome, local | From $110 direct, or UK stock at The Pi Hut | You want a similar sensor spread in a much smaller box and don't mind ESPHome |
| SwitchBot Meter Pro CO2 | CO2, temp, humidity | Native, Bluetooth | Around £60 | You only need CO2 on a big desk display |
| IKEA ALPSTUGA | CO2, PM2.5, temp, humidity | Native, Matter over Thread (needs a border router) | Around £25 | You want CO2 and PM2.5 for pocket money and already have Thread |
Versus the Aranet4 Home: the Aranet is the reference CO2 meter — years on two AA batteries, an always-on e-ink screen, similar NDIR accuracy — but it measures no particulates or VOCs and talks Bluetooth, so you need an adapter or ESPHome proxy within range. Pick it for a portable meter; pick the AirGradient for a fixed sensor feeding automations.
Versus the Apollo AIR-1: the closest rival on paper — a Sensirion SEN55 in a 61mm cube for less money, with CO2 as an optional add-on, and unlike the AirGradient it's stocked in the UK by The Pi Hut. It runs ESPHome rather than a core integration, so you adopt it through the ESPHome add-on, and one reviewer who ran both side by side found its fan gives off a persistent low hum in a quiet room, where our AirGradient is silent. If desk space matters more than a display and a warranty, it's a fair alternative.
Versus the cheap CO2 monitors: the SwitchBot Meter Pro CO2 and IKEA ALPSTUGA are what we'd recommend to anyone who just wants a CO2 reading. Neither gives you VOC or NOx, the IKEA needs a Thread border router, and neither has anything like the AirGradient's configuration entities — but at £25–60 they cost a fraction of an imported ONE.
What the AirGradient ONE won't do: it has no carbon monoxide, smoke or radon sensing, no battery, and no Matter or Zigbee radio. For the safety sensors, see our best smart carbon monoxide detectors UK roundup. AirGradient also sells an outdoor sibling, the Open Air, which we have on test for a separate review.
Who should buy the AirGradient ONE?
Anyone already running Home Assistant who wants CO2, PM2.5 and VOC data feeding real automations — an extractor fan on a smart plug, a ventilation reminder, or an air quality history for a damp-prone room. It's also the right pick if you care that the hardware and firmware are open and the device can run with no cloud at all. It's a poor fit for anyone wanting a zero-setup app experience: the captive-portal pairing and the lack of a UK retailer add friction that a SwitchBot or IKEA monitor doesn't have.
Verdict
The AirGradient ONE is the most Home Assistant-friendly air quality monitor we've tested. It's discovered automatically, exposes a genuinely useful sensor set and every hardware setting over local polling, and one tick-box takes it fully offline. A full day-night cycle of real readings backs that up: flat overnight CO2, a cooking spike caught and cleared within minutes, and a VOC index that settled to a steady baseline. The one caveat is UK buying: with no local stockist you're importing it at about £205 plus shipping, which is Aranet4 money for a device that does far more but asks a little more of you at setup. For a Home Assistant household that wants trustworthy air quality data without a cloud dependency, it's an easy recommendation.
If open-source, cloud-optional monitoring isn't the priority, see our best indoor air quality monitor UK roundup for HomeKit, radon and pure-CO2 alternatives.