The Problem With RF Devices in Home Assistant
Radio frequency devices speak a one-way dialect. A 433 MHz RF remote fires a burst of radio pulses encoding an "on" or "channel 2" command, and the receiver acts on it. There is no acknowledgement, no network address, no API. Until recently, intercepting and replaying those pulses required either a proprietary bridge or writing raw timing values into ESPHome firmware — and reflashing the device every time you wanted to add a new command.
Infrared (IR) faced a similar problem. Home Assistant could send IR commands to a TV or air conditioner via ESPHome, but each command had to be baked into the firmware at compile time. If you bought a new TV or wanted to control a second air conditioner, you needed to edit your YAML, recompile, and reflash over the air. It was workable but slow, and it made IR feel like a second-tier integration rather than a proper platform.
Both of those limitations are now resolved.
What Is the ESPHome IR/RF Proxy Component?
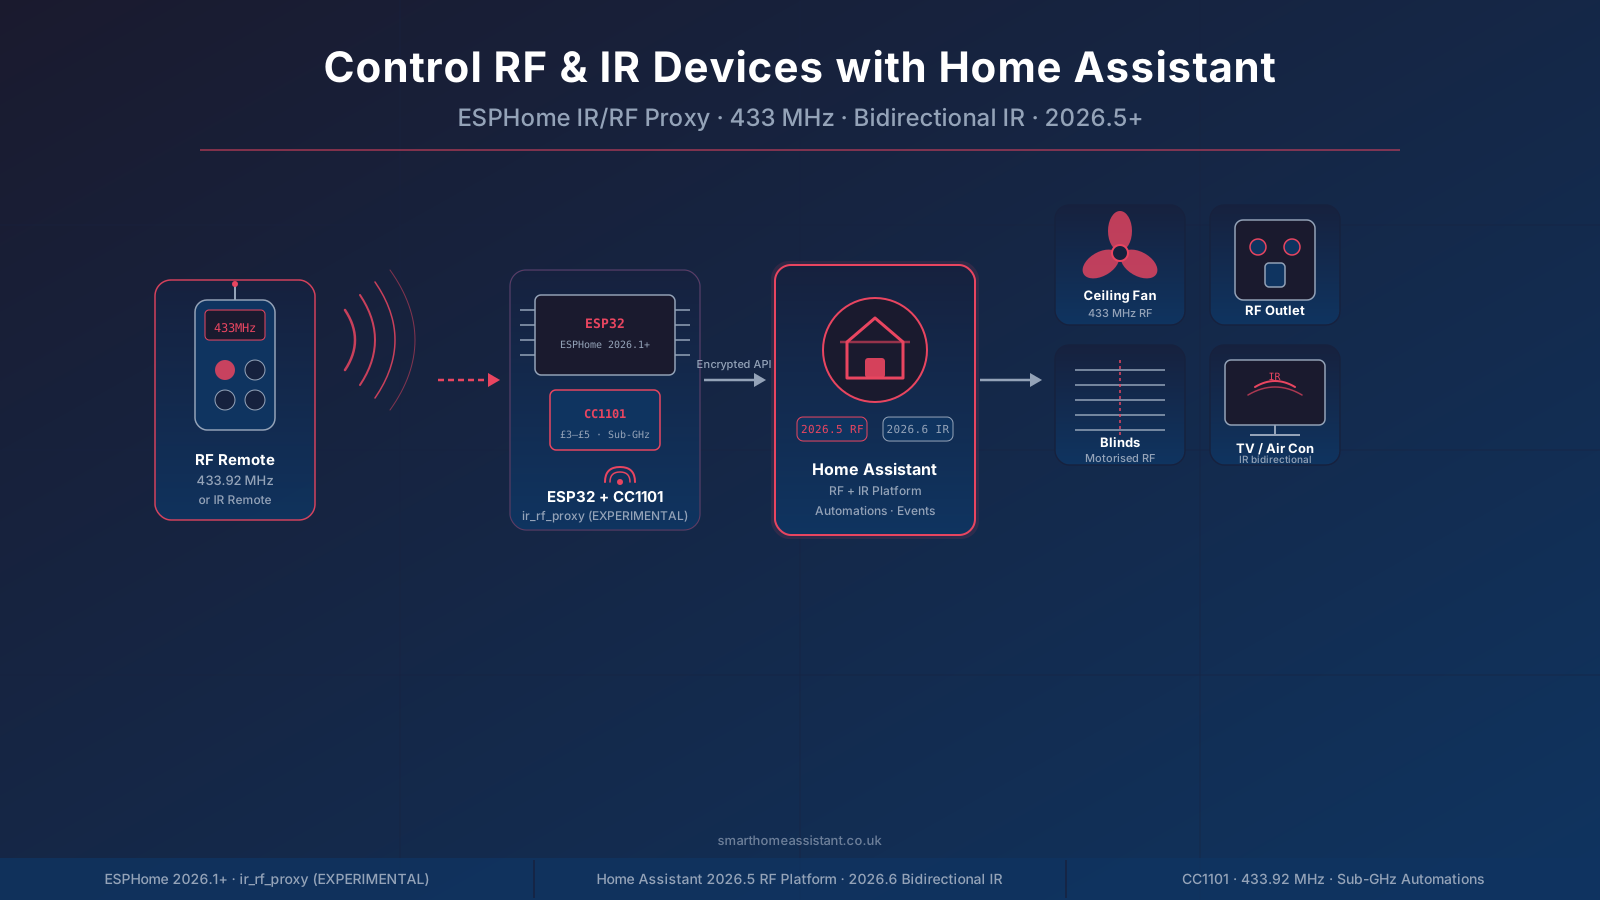
The ir_rf_proxy component, introduced in ESPHome 2026.1.0, acts as a runtime bridge between Home Assistant and your radio hardware. Instead of encoding commands in firmware, the proxy streams raw timing data — alternating microsecond mark and space durations — between Home Assistant and the ESP device over the encrypted native API. You can transmit a new command or capture a signal from an existing remote without touching the YAML or reflashing anything.
The component supports two platforms:
- Infrared platform — creates an infrared entity linked to a
remote_transmitterorremote_receiver. The transmitter requires a carrier duty cycle of 30–50% (typical for IR LEDs). The receiver can declare its demodulation frequency, for example 38 kHz for a TSOP38238 receiver module. - Radio frequency platform — creates a
radio_frequencyentity. The transmitter is set to 100% duty cycle because RF hardware handles its own modulation. You declare the carrier frequency — typically 433.92 MHz for UK remotes or 868 MHz for some European devices.
For 433 MHz work, the CC1101 transceiver module is the recommended hardware. Costing around £3–£5, the CC1101 covers all common sub-GHz bands (315, 433, 868, and 915 MHz) and wires directly to an ESP32 via SPI. ESPHome's CC1101 integration exposes on_transmit and on_complete triggers that the proxy uses to switch the module between transmit and receive modes automatically.
The component is part of the broader ESPHome ecosystem for Home Assistant, which handles everything from DHT22 temperature sensors to custom displays — all without an MQTT broker or cloud dependency.
Experimental Status — Read This First
The ir_rf_proxy component carries an explicit instability warning from the ESPHome team: "This component is EXPERIMENTAL. The API may change at any time without following the normal breaking changes policy."
In practice this means the YAML configuration syntax, the entity types exposed to Home Assistant, or the underlying API protocol could change in a future ESPHome release without the usual deprecation notice. If you build automations around this component, be prepared to update your configuration when upgrading ESPHome. For a home lab or personal project this is entirely acceptable; for a production deployment relied on by other household members, factor the risk in accordingly.
Home Assistant 2026.5 — RF as a First-Class Platform
The ESPHome component alone would be useful, but Home Assistant 2026.5 went further by adding native RF entity support to the core. The release notes describe radio frequency joining infrared as a "first-class citizen" — meaning the RF transmitter is now a proper Home Assistant entity type, not a workaround or custom component.
The architecture is straightforward. An RF transmitter (your ESPHome device with CC1101, or a supported Broadlink RM4 Pro) registers as an radio_frequency entity. Device-specific integrations — for blinds, fans, outlets, and so on — then reference that transmitter entity to send commands. When you set up a new RF device in Home Assistant, you simply pick your transmitter from a dropdown; no YAML on the Home Assistant side is required.
The 2026.5 release shipped with two device integrations out of the box: Honeywell RF string lights and Novy cooker hoods. These are narrow examples, but they demonstrate the pattern that third-party integrations can follow. Existing ESPHome users can already use the ESPHome Device Builder to flash and configure RF-capable boards without touching a terminal.
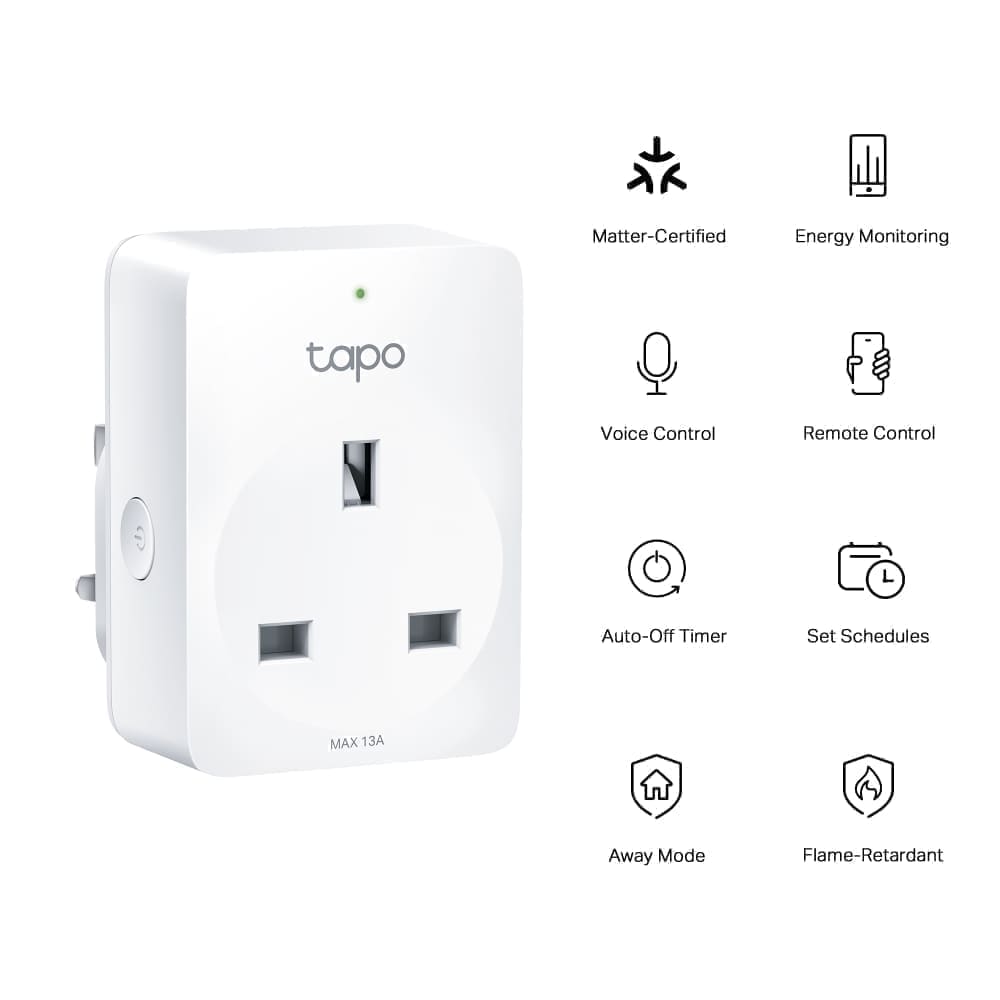
For UK homes, the most immediately useful targets are the 433.92 MHz RF outlets and sockets sold widely on Amazon and in hardware shops — the kind that come with a handheld remote and no Wi-Fi chip. Those outlets can now be switched by Home Assistant automations, timed schedules, or voice assistants without any hardware modification to the outlet itself.
Home Assistant 2026.6 — Listening to IR Remotes
Home Assistant 2026.6 completed the picture for infrared by adding IR receiver event entities. Previously, Home Assistant could send commands to a TV or air conditioner but had no way to know what was happening at the physical remote. If someone adjusted the volume with the original remote, Home Assistant's state for that device became stale immediately.
The 2026.6 IR receiver integration changes this. When an ESPHome device with an IR receiver captures a signal, it fires an event in Home Assistant that can be used directly as an automation trigger. The release notes put it plainly: Home Assistant can now keep itself in sync with the original remote — use the remote that came with the device, and Home Assistant sees it happen instead of being left in the dark with stale state.
The first device integration to use this is LG Infrared, which exposes received commands as named events. But the ESPHome IR receiver support is generic — any IR remote near the receiver will produce events, which means you can repurpose a spare remote as an in-room Home Assistant controller with no additional hardware cost.
This pairs naturally with the Home Assistant automations system: an IR event trigger can fire any automation, run a script, or change a scene — treating a £2 TV remote as a fully programmable input device.
Which Frequency Does Home Assistant Support: 433 MHz, 433.92 MHz or 868 MHz?
Home Assistant itself has no radio; the ESPHome RF proxy transmits and receives whatever carrier frequency its radio chip is set to, so 433.92 MHz and 868 MHz both work provided the hardware supports them. The frequency must match your remote, and it is printed on the remote's PCB or label.
- 433 MHz / 433.92 MHz — the most common band for UK fans, blinds, garage doors and mains sockets. 433.92 MHz is simply the centre frequency of that band, so "433 MHz" and "433.92 MHz" remotes use the same CC1101 setup.
- 868 MHz — used by some European blinds, alarm sensors and heating remotes. A CC1101 covers it, but many cheap modules ship with an antenna and matching network tuned for 433 MHz, so buy a module sold specifically as 868 MHz.
- Not covered — Wi-Fi, Zigbee and Bluetooth devices use 2.4 GHz and do not need an RF proxy. Encrypted rolling-code remotes may not be replayable.
Which hardware should I buy? An ESP32 board plus a CC1101 module is the recommended pairing for RF; an ESP32 with an IR LED and TSOP38238 receiver covers infrared. Both are linked in the parts box above.
What Do You Need to Get Started?
For RF Control (433 MHz)
- ESP32 development board — any DevKit board works; the Wemos D1 Mini32 or a generic 38-pin ESP32 board costs £3–£6 from UK suppliers such as The Pi Hut or Pimoroni.
- CC1101 transceiver module — around £3–£5 on eBay UK or AliExpress. Covers 315, 433, 868, and 915 MHz bands. Connects via SPI (6 wires plus power).
- ESPHome 2026.1.0 or later — installed as a Home Assistant add-on or standalone Docker container.
- Home Assistant 2026.5 or later — required for the
radio_frequencyentity platform.
For Infrared Control and Receiving
- ESP32 board — same as above.
- IR LED (transmit) — a 940 nm IR LED and a 2N2222 transistor as a driver. Total component cost under £1.
- IR receiver module (receive) — a TSOP38238 or similar 38 kHz demodulator. Around £1–£2. Plug in and point it towards the remote you want to capture.
- Home Assistant 2026.6 or later — required for IR receiver event entities.
Shop this build's parts
Alongside the UK suppliers above, here's each part on Amazon UK (affiliate links — we may earn a small commission):
What Can You Automate?
Combining RF transmit, RF receive, IR transmit, and IR receive opens up a class of devices that were previously inaccessible to Home Assistant entirely:
- RF ceiling fans — set speed and light state on a schedule, or tie them to a temperature sensor.
- Motorised blinds and roller shutters — open at sunrise, close at sunset or when a Lux sensor detects direct sunlight on a window.
- RF mains outlets — control lamps, heaters, or Christmas lights without replacing the socket.
- Air conditioner state sync — capture IR commands from the original remote so Home Assistant always knows the current mode and temperature setpoint.
- Spare remotes as controllers — dedicate an old TV remote as a bedside panel: volume-up becomes bedroom lights on, volume-down becomes lights off.
- Garage doors and gate motors — many use 433 MHz rolling-code or fixed-code remotes compatible with the CC1101 receiver.
The common thread is longevity: none of these devices need to be replaced. A ceiling fan bought in 2015 with a 433 MHz remote can join a 2026 Home Assistant setup without modification, extending its useful life rather than adding to landfill.
What Are the Next Steps?
The ESPHome documentation at esphome.io/components/ir_rf_proxy covers the full YAML configuration for both IR and RF platforms, including CC1101 wiring and the on_transmit/on_complete trigger pattern. Given the experimental status of the component, it is worth bookmarking the changelog so you catch any breaking changes early.
If you are new to ESPHome, start with the ESPHome beginner's guide to set up the add-on and flash your first device before layering in the IR/RF proxy. Once you are comfortable with the YAML structure, adding the proxy platform is a matter of a few extra lines — and no reflashing required from that point on.